Building your own desktop sounds harder than it is. Modern parts only fit together one way, most connectors are keyed, and the whole job is a sequence of small, repeatable steps. This guide to how to build a PC walks a first-timer through the usual build order, from checking compatibility to the first boot. If you searched for a step-by-step PC build guide or how to assemble a computer, the order below is the one most published guides share.
Important: this guide is compiled from published guides, manufacturer documentation and reviewer advice, not from hands-on testing by us. Parts differ. Your motherboard manual, CPU cooler instructions and case manual always take priority over anything written here, and we give no exact torque, temperature or voltage figures because they vary by model. Building a PC carries a small risk of damaging parts through static or mistakes, so go slowly.
What to Know Before You Start
A few decisions and checks save the most trouble later.
- Compatibility. The CPU socket must match the motherboard, the RAM type (DDR4 or DDR5) must match what the board supports, and the board’s BIOS must support your specific CPU. Some boards need a BIOS update before a newer CPU will start. The motherboard maker’s CPU support list shows this.
- Case and cooler clearance. Check that the case fits your motherboard size (ATX, micro-ATX or mini-ITX), the graphics card length and the cooler height or radiator size.
- Power supply. Pick a unit with the connectors your parts need, including the 24-pin motherboard cable, the CPU power cable and the graphics card power cables. Check the card maker’s recommended wattage.
- Tools and workspace. A magnetic Phillips screwdriver and a clear table are usually enough. Keep the manuals handy, and keep the small box of screws that came with your case and motherboard.
- Static. Touch bare metal on the case now and then, work on a non-carpeted surface, and hold boards by their edges.
Step-by-Step: How to Build a PC
Step 1. Install the CPU, RAM and M.2 SSD on the motherboard
Most guides suggest building on top of the motherboard box first, outside the case, because the space is easier to work in.
- CPU: open the socket retention arm, match the small triangle on the processor with the marker on the socket, and lower it straight down without sliding or pressing hard. Close the arm. On Intel LGA sockets and AMD AM5 sockets the pins are in the socket, so never touch them.
- RAM: open the slot clips, line up the notch in the module with the slot and press on both ends until the clips snap shut. With two sticks, the usual slots are the second and fourth from the CPU, but the motherboard manual decides.
- M.2 SSD: insert it at an angle in the M.2 slot, press it flat and fasten it with the small screw. Some boards have heatsinks that must be removed first, and some slots share bandwidth with SATA ports, which the manual explains.
Step 2. Mount the CPU cooler
Use the bracket, spacers, screws and backplate specified for your exact socket. Stock coolers may come with thermal paste pre-applied. Otherwise apply a small amount of paste to the CPU, as the cooler maker directs, and do not reuse a cooler without cleaning old paste. Tighten the cooler’s screws a little at a time in an opposite pattern so the pressure is even, then plug its fan cable into the CPU fan header. Some builders fit the cooler after the board is in the case, depending on the case and cooler design. Remove any plastic film from the cooler’s base first.
Step 3. Prepare the case
Check that the case standoffs line up with your board’s form factor. An extra standoff in the wrong position can touch the underside of the board and may cause a short, so remove any that do not match a mounting hole. If your board has a separate I/O shield, fit it into the rear opening before the board goes in. Many current boards have the shield built in.
Step 4. Install the motherboard
Lower the board in, align the screw holes with the standoffs and fasten it with the supplied screws. Tighten until snug but do not overtighten, since excess force can damage the board.
Step 5. Install the power supply and connect power
Fit the PSU in its bay, with the fan facing the vent according to the case design, and screw it in. Connect the 24-pin cable to the motherboard and the CPU power cable (4-pin, 8-pin or both, depending on the board) near the top of the board. Use cables that came with your own PSU only, because modular cables from different brands are not interchangeable and the wrong pinout can damage parts.
Step 6. Install the graphics card
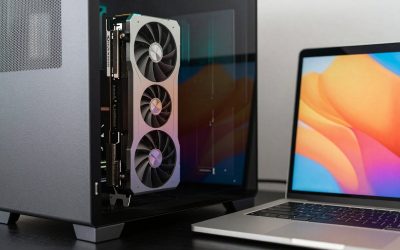
Remove the matching slot covers at the back of the case, open the latch at the end of the top long PCIe slot, press the card in until it clicks and screw its bracket to the case. Then connect the card’s power cables directly from the PSU, using the connectors listed in the card’s manual and avoiding splitters unless the card maker allows them.
Step 7. Connect the front panel and fans
Connect the small power switch, reset switch and LED cables to the front panel header, usually at the bottom right of the board. LEDs are polarity-sensitive but harmless if reversed, and the motherboard manual shows the exact pin layout. Then connect the front USB, USB-C, HD audio and case fan cables to their headers.
Step 8. Add storage drives
If you use 2.5-inch or 3.5-inch drives, mount them in the case bays and connect a SATA data cable to the board plus a SATA power cable from the PSU.
Step 9. Test before you tidy
Connect the monitor to the graphics card (not the motherboard video port, if you have a dedicated card), plug in a keyboard and power on. Reach the BIOS or UEFI screen with the key your board manual lists, often Delete or F2. Check that it sees the CPU, the full amount of RAM and your drives, and check that the fans are spinning. If it works, shut down and do your cable management. If it does not, jump to the troubleshooting section below.
Step 10. Install Windows and drivers
Create a Windows installation USB with Microsoft’s media creation tool on another computer, boot from it and follow the setup. Then install the chipset, graphics and network drivers from the manufacturers’ sites, and run Windows Update. Some guides also suggest updating the BIOS from the motherboard maker’s page, but only follow the maker’s instructions, because a failed update can leave a board unusable.
If It Does Not Turn On
Work through the simple causes first.
- Check the PSU switch, wall cable and 24-pin plus CPU power connections are fully seated.
- Reseat the RAM; a half-seated module is one of the commonly reported culprits.
- Make sure the graphics card power cables are plugged in and your monitor cable goes to the card.
- Check the front panel power switch pins against the manual, or briefly touch the two power pins with a screwdriver to test the board.
- Look for diagnostic LEDs or a debug display on the board; the manual explains the codes. Beep codes differ by BIOS vendor, so use your own manual.
- If the CPU is new and the board is older, check whether it needs a BIOS update to support it.
Useful Extras
Two small items are worth having. A tube of standalone thermal paste is handy if your cooler does not include any: Check Arctic MX-6 thermal paste on Amazon. A precision magnetic screwdriver set also makes small screws less annoying: Check iFixit Mako Precision Bit Set on Amazon. Prices change often and we did not live-check them.
FAQ
How long does it take to build a PC for the first time?
We have no measured figure. Allow a relaxed afternoon, and more if you plan tidy cable management or install a liquid cooler. Reading the manuals first speeds things up.
Do I need thermal paste?
Many stock coolers come with paste already applied, and many aftermarket coolers include a small tube. Check your cooler’s instructions. If you remove and refit a cooler, clean off the old paste and apply fresh.
Which parts go in first?
Most guides install the CPU, RAM and M.2 drive on the motherboard before it goes in the case, then the cooler, motherboard, power supply, graphics card and finally the cables. The motherboard and cooler manuals can change the order slightly.
Is building a PC safe for a beginner?
It is a common first project, and the main risks are static discharge, bent socket pins and forced connectors. Go slowly, never force a part, and ground yourself on the case. A mistake can void a part’s warranty, so check each part’s warranty terms.
Write Your Review
No reviews yet. Be the first to share your experience!